
It is Flute Friday once again! I wish my flute knew that it was Flute Friday and would, by some sort of Harry Potter magic, play everything perfectly without my help to celebrate.
For most of us the new school year is well under way. This is the time of year when many new flute students, or continuing flute students not yet studying privately, approach flute teachers for introductory lessons. The first lesson with any student is tricky. As a teacher you not yet familiar with their strengths and weaknesses and as a student you probably have no idea how strict (or, in my case, eccentric) your teacher will be. Parents are also concerned with how younger students will progress in your studio and what their responsibility is in their child’s study. So many question marks!

As I mentioned in my last blog, I moved to Houston recently and have already taught a handful of introductory lessons so far this school year in my new community. Although I presume that many of you have your own systems and lesson plans in your practices, I have found some of the below approaches quite successful in preparing for introductory lessons. I hope these suggestions are helpful to new teachers or ones looking for new ways to relate to parents and students at the first lesson.
If the student is a beginner (meaning they have 0 experience with the flute or flute playing), the first place to begin is with the headjoint. We must establish a sound before we add the keys, notes, rhythm, breath control, etc. Work with your student to achieve a strong, steady sound by placing the lip plate at the bottom center of the lips and, with the right hand, roll the headjoint back and forth to find what we call the “sweet spot” (this is just a hokey way of describing the angle and alignment of the embrochure that will produce the best quality of sound). Once the tone is established you can demonstrate to your student how to play a rather abstract version of Mary Had a Little Lamb simply using the headjoint (did you know you could do this??). Make an “L” with your right hand and place the open end of the headjoint in the bend of the “L”. Blow across the headjoint to sound the pitch. This will be the highest note in the tune. To play the middle note, curve the index finger around the headjoint and lightly curve the 2nd and 3rd fingers around the space outside of the headjoint. Again, blow across the headjoint to sound the pitch. This will represent the middle note of the song. Finally, to produce the lowest tone, curve the fingers completely around the space outside of the headjoint and again blow across the lip plate to create the sound. Mary Had a Little Lamb follows the sequence below:
High, middle, low, middle, high, high, high (pause), middle, middle, middle (pause), high, high, high (pause), high, middle, low, middle, high, high, high, high, middle, middle, high, middle, high.

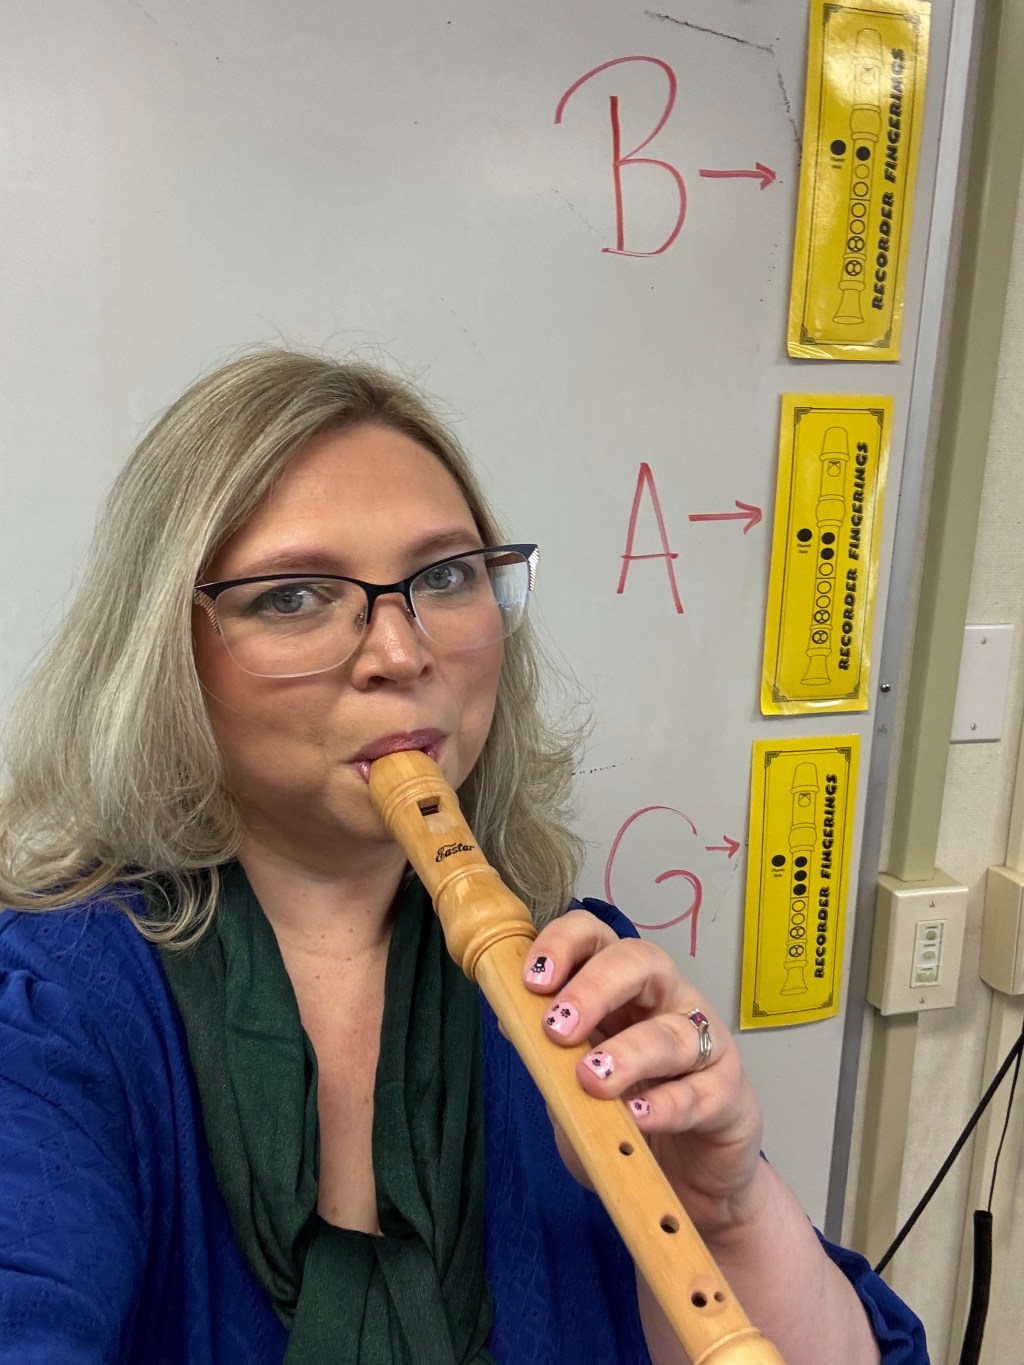
They have just played their first piece!! Of course it will not sound exactly like the notes in the tune but it will be generally within the ballpark. With this simple song in their head, it is time to learn the first few notes. At this point you can demonstrate how to properly put the instrument together and how to align the tone hole with the center of the first key. The first 3 fingerings they will learn are B, A, G (as in “this piece is in the BAG”…. I said I was a little eccentric!). Take them through these fingering and then apply them to the notes in Mary Had a Little Lamb:
B, A, G, A, B, B, B (pause), A, A, A, B, B, B (pause), B, A, G, A, B, B, B, B, A, A, B, A, G.

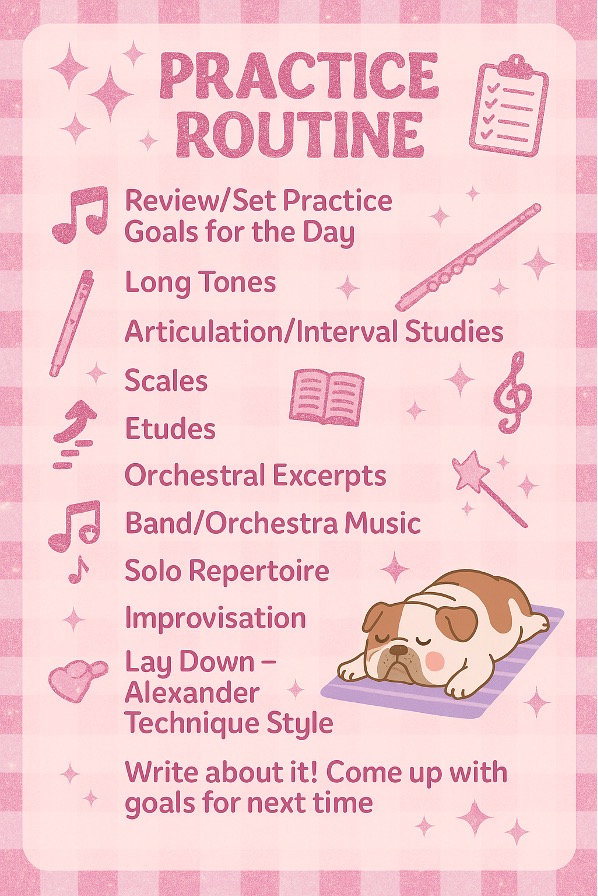
From here I lead them through the fingerings for a simple C major scale in the middle octave, assigning them to master these fingerings for their next lesson from memory (without the help of their fingering chart). I also assign introductory lessons from their workbook (I am partial to the Rubank beginner series but you may have your own favorites) for homework. With the remainder of the lesson we discuss proper posture (both sitting and standing) and tips on breathing (this may include an introduction to “frog breathing” depending on how much time is still left in their lesson). Finally we discuss practice – how to structure, how much to practice each day, what tools they will need to properly practice (music stand, water, pencil) and I distribute practice cards. All beginning students are required to submit practice card so I can get an idea of how much they are practicing and where they are devoting most of their time. This way we can look for better ways to plan their flute playing over busy weeks and how to get the most out of shorter practice session.
This is typically more than enough material for the first lesson with a beginner. Often a beginner will have questions or will want to discuss goals or songs they would like to learn at this first lesson. Make sure to jot everything down in their notebooks so you can begin to research and assign music in subsequent lessons.

I typically ask students that have already been playing for 1 or more years to prepare 2 pieces or excerpts of their choice – one fast and one slow. This allows me to gage both their sound quality and mastery of technique. There are 3 “P”s that I always address at the first lesson – posture, pulse and practice. The very first thing I monitor is how they stand, how they hold the flute and how much (or little) do they move their arms when they play. Depending on what we need to work on, I will lead them through some Alexander Technique based exercises or work on the trampoline before moving on to rhythmic exercises such as marching and playing or working with an egg shaker. Finally we discuss practice – how they structure their time and what exercises we will use for long tones, scales (cue Taffanel and Gaubert), and what pieces they would like to work on (even if it is just a certain style that we discuss). The lesson always ends with an improvisation exercise – because sometimes we need to remember that music is simply an act of communication and expression. Please see my Practicing Improvisation blog for more information about this exercise.
I hope that these lesson plans give you some ideas on how to design your own first lessons, or, if you are a student, what to expect at an introductory lesson with a new teacher. Do you have other approaches to first lessons? Do you have a first lesson experience that really stands out as a positive experience? Please comment below!


Leave a comment