

Greetings and welcome to a new Flute Friday! As we enter the holiday weekend, many of us will be tackling our Spring-cleaning list. I, myself, have started cleaning out a few corners in my closet and was reminded of a conversation I had earlier in the week with a student about how to properly clean their new flute. After cleaning my flute consistently for the past 30 years, I realized proper flute care isn’t always an intuitive process. In today’s blog, I will be discussing some of the basics for keeping your flute spick and span and sparkling brighter than this weekend’s Full Moon. Consistency is key and the right tools can help make flute maintenance a super easy process.

Taking Your Flute Apart. First thing’s first – You’ve got to disassemble your instrument. There are good ways to do this and there are not-so-good ways. It is important to avoid gripping the keys as you carefully twist the head joint in one direction to remove it from the left side of the body of the flute and the foot joint from the right side. I like to tell my students the horror story of the time I fell down a flight of bleachers while gripping my flute by the keys immediately before a middle school band concert. I recovered from my fall, but my flute did not. Unbeknownst to me, the keys and rods were damaged, making certain notes impossible to sound. When it came time for my solo, nothing came out of my flute, and I was immediately embarrassed. The lesson I learned that day was to never grip the flute by the keys; A lesson I share with all of my students and now with my readers.
Cleaning Rod. Most flutes come with a cleaning rod, which is a device of made of metal or wood that looks like a large sewing needle. A cleaning rod is essential for cleaning the interior of your flute. I prefer wood cleaning rods to metal wherever possible as wood is less likely to accidentally scratch the metal inside the flute. Amazon has a number of inexpensive options like this Wooden Flute Cleaning Rod from Qj-solar: https://amzn.to/3KeyJ9s (affiliate link).

Interior Cleaning Cloth. A simple gauze cloth is the best option to use on the interior of the flute. There are many options available on Amazon for this. The Herco HE54 is a good choice that can also often be found at local instrument retailer shops https://amzn.to/44Y3Vn9 (affiliate link). With your cleaning cloth in hand, simply thread the cloth through the needle part of the cleaning rod, twisting the cloth to cover the top of the rod once threaded. Then carefully insert the cloth-covered rod into each section of the flute, twisting carefully to remove moisture from the inside of the flute. As the body of the flute will extend the length of the cleaning rod, it is best to insert half the rod in the left side, twisting to clean the top half, and repeating on the right side of the body to clean the bottom half. Again, remember to avoid gripping the keys while cleaning individual sections of the flute. It is also important to remember to wash your cleaning cloth periodically. You may either handwash with clear, preferably unscented, dish soap, or by tossing it into a washer/dryer (with the caveat to avoid dryer sheets during the drying process as these will add scents and residue that could eventually end up on the inside of your flute). The most important part of cleaning the inside of your flute is that you remove the moisture. Moisture that lives on the inside of your flute not only leaves your flute a smelly mess, but could also eat away at your key pads. Replacing key pads can be an expense business! To prevent both of these things, and to build good habits in general, remember to clean the interior of your flute every time you put your flute away.
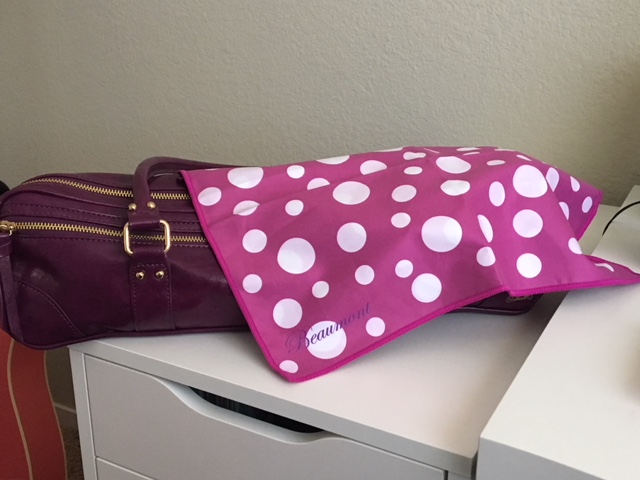
Exterior Cleaning Cloth. It is also important to keep the outside of your flute clean, sparkling, and free of fingerprints. A good micro-fiber cleaning cloth will help wipe off the daily dirt and grime from the outside of your flute. My favorite exterior cloth is the Sempre Flute cleaning cloth: https://flutacious.com/Sempre-Flute-Cleaning-Cloth-Artist-Practice-Series. Simply wipe your flute and keys with the cloth, applying only gentle pressure to the keys. Regular cleaning of the exterior of your flute will keep the instrument in tip top shape, not to mention looking gorgeous. Word of warning – avoid cleaning the sides of the keys – stick to the tops to avoid accidental contact with the key pads. Also avoid using any types of silver polish on your flute. These cleaners, which often come in liquid form, are far too harsh for your instrument and could end up on the key pads, inviting larger problems for your instrument.
PRO-TIP – Make sure to store both your interior and exterior cleaning cloths in an exterior pocket in your flute case. If you do not have an exterior pocket, make sure to store these clothes in a safe, separate, clean case.
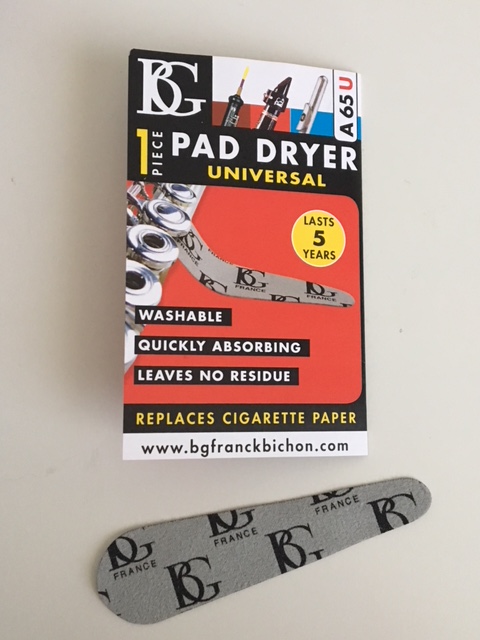
Key Pads. From time to time, you may notice that moisture makes its way onto your key pads, often resulting in a note sounding as if the key in question is being pressed when it is not. Not to worry – This is common and has an easy solution. Cleaning paper is thin, clean paper that can be inserted between a key pad and the key hole to sop up the extra moisture. Press gently on the key a couple of times while the paper is inserted to transfer the moisture to the paper. Be careful not to pull the paper from a depressed key. This could cause damage to the pad itself. I prefer to use cleaning paper available from Yamaha (https://amzn.to/4dTPWme – affiliate link), but you may also use cigarette paper (provided that it is unpowered and ungummed), or a reusable pad cleaner such as the PG Pad Dryer: https://www.flute4u.com/BG-Pad-Dryer-1-Piece.html. As a young flutist, I would ask my mother to pick up cigarette paper from our local grocery store, raising a few eyebrows from various clerks. But it worked like a charm and was always there when I needed it!
Anti-Tarnish Strips. A great way to prevent the more stubborn yellow-orange tarnish that often builds up over time between the keys is to keep an anti-tarnish strip in your flute case. A single strip goes inside your flute case and simply lives there for roughly 3 months at a time. The 3M Anti-Tarnish Strips are a staple in the flute world: https://www.flute4u.com/3M-Anti-tarnish-strips-8-Pack.html

Annual Clean, Oil, and Adjust (COI). Prevention is key. Once a year, remember to schedule a clean, oil, and adjust with your local music store or flute repair person. This is a more intricate cleaning where your flute will be taken apart and cleaned thoroughly in the parts that a cleaning cloth cannot reach (interior rods, springs, screws and rollers, and between keys). If you have any pads that have seen better days or ones that are not completely closing the key hole when pressed (also known as pad leaks), a technician can repair them during a COA before they become bigger problems. Some companies, such as Flute World, offer flute care programs with the purchase of a new instrument that provide an annual COA with a monthly fee (for more information, see Flute World’s program here: https://www.fluteworld.com/flute-care/).

Additional Thoughts:
- Avoid those caterpillar-style cleaning snakes. These trap moisture and are difficult to store. Storing them within the body of the flute can lead to serious problems (hello bacteria!). It is better to use a simple gauze-style interior cloth that can be cleaned regularly.
- Remember to store your flute away from extreme temperatures. So, no leaving your flute next to exterior windows or by heaters in the winter. This can lead to problems with the flute itself that will take more extensive repairs than a COA may offer.
- Avoid messing with the cork. There is a line on the end of a cleaning rod that can be inserted in the headjoint to align with the center of the flute’s tone hole. If the line is off-center, you may need to unscrew the crown to make adjustments. But otherwise, leave the cork alone. Bring cork-cleaning to your flute technician during a COA.
- Periodically clean older flutes that live in your archives. These too can become tarnished if you do not use anti-tarnish strips. Older flutes also need maintenance if you intend to play them in the future.
What are your top flute cleaning tips? Are there cloths that you prefer over others? Do you have a favorite type of cleaning paper? How often do you polish your flute? Do you use anti-tarnish strips? Do you have a great flute cleaning tip not mentioned here? Please comment below!
Happy fluting (and cleaning)!


Leave a comment